Sunday 28 November 2010

Clavius

My last stop was much further south at the huge crater Clavius just below Tycho. At 225km diameter Clavius is one of the largest impact craters on the Moon.


Clavius is a relatively old crater having been formed around 4 billion years ago. Despite its age Clavius is well preserved but has numerous other impact craters on the crater floor. Starting from Rutherford on the southern rim, Clavius D, C, N, J and JA form an anti-clockwise arc across the crater floor. The decreasing size of these craters means they are often used to test the resolution of amateur telescopes. Clavius JA doesn't show up well in this photo but is usually quite clear if I use a Barlow lense. The other craters on the rim are Porter (north-east), Clavius L (west) and Clavius K (south-west).

In contrast Tycho, visible in shadow to the north-west of Clavius, is a very young crater around 100 million years old. There is speculation that Tycho was formed by an impactor from the same family of asteroids that produced the impactor that caused the extinction of the dinosaurs on Earth.

For completeness the crater on the terminator south-west of Clavius is Blancanus; the large crater to the north-east is Maginus; and the crater in the south-east with the prominent central peak is Moretus.

Friday 26 November 2010

Copernicus

It's a short hop from Eratosthenes to Copernicus and this gave me a chance to get a contrasting picture to the full-moon shot I took a few months ago.

Here are the pictures side by side:


As I mentioned in my July post, the bottom picture is misaligned - the crater in the bottom right is the one at the top edge of the other picture. Eratosthenes just drops off the bottom of the full-moon shot.

The misalignment doesn't matter much since the object of interest is Copernicus itself. The shadows really show up the 1km depth of the crater. Actually I think a little less shadow would have given a better result as more of the crater floor would have been visible. Copernicus is a young crater and has lots of features on the crater floor that would have shown up nicely.

Friday 19 November 2010

Eratosthenes

My next stop along the half-moon terminator was Eratosthenes. Named after the father of geography, inventor of the system of latitude and longitude, and all round Greek genius, Eratosthenes is located on the south edge of Mare Imbrium at the western end of the Montes Appenninus. It's a relatively deep crater that catches the eye due to it's prominent location and proximity to the crater Copernicus.

Similarly to my observations of Plato described in my previous post, I was dodging light cloud for much of the session. Here's the best shot:


Eratosthenes is the crater towards the bottom-left. The depth of the crater and terraced inner rim are clearly seen. There are also multiple central peaks visible and little evidence of lava flooding which suggests the crater may be younger than flooded craters such as Plato. In fact Eratosthenes is believed to be around 3.2 billion years old and its formation marks the start of the Eratosthenian Period which is partly characterised by reduced volcanic activity.

Looking closely at the bottom-left quarter of the picture it is possible to see the ejecta from the neighbouring crater Copernicus, which show up as lines of lighter coloured material. The three craters at the top of the picture, moving left to right, are Timocharis, Archimedes and Autolycus.

Thursday 18 November 2010

Plato

After much too long a break I've finally managed to get some new Moon pictures. Despite some intermittent wispy cloud and a sudden onset of fog I got a fairly good run at a near half moon.

Starting from the north, this post concerns Plato (the favourite crater of Space-1999 fans). As suggested by having a famous name, Plato is one of the most distinctive lunar craters. Those with good eyesight can spot it with the naked eye as a dark patch near to centre-top of the lunar disk. Plato is about 100km in diameter and has a dark, lava filled floor. It is located at the western end of the mountain range Montes Alpes and between Mare Imbrium (the Sea of Showers) and Mare Frigoris (the Sea of Cold). Plato is nearly 3.8 billion years old and slightly younger than Mare Imbrium to the south.

Here's the best picture of the bunch (which isn't bad considering there was never more than a couple of minutes between clouds):


The angle of the sunlight shows the irregular rim and jagged peaks casting shadows across the crater floor.

For completeness, the crater on the terminator towards the top of the picture is Fontenelle. The four craters forming an arc in the top-right are Anaxagorus, Epigenes, Timaeus, Archytas and the large, flatter crater in the top-right corner is Goldschmidt. The mountain to the south of Plato is the 2.4km high Mons Pico.

Monday 1 November 2010

Sunspots

There's still not much action on the sunspot front but at least there is usually something to look at pretty much every day. A couple of weeks ago I pulled the camera out again for a few snaps.


I thought I'd also have a go at zooming in on one of the sunspots using the webcam (in this case the one towards the bottom of the disk in the image above). I had the usual problem of achieving focus throughout the video capture but some detail shows up.

Sunday 26 September 2010

Altair

Last month I tried a few different ideas with my Star Analyser diffraction grating. One of the bigger successes was taking some black and white images as well as the usual colour shots. Since it's usually best to experiment on something that's easy to find and that this was still summertime, I settled on Altair.

Altair is one of our near neighbours, about twice the mass of the Sun and ten times as luminous. Similarly to the other two points of the summer triangle, Altair is of spectral class A so has some fairly strong Balmer lines that should show up nicely using the Star Analyser. Here's what I ended up with:


Both sets of spectra have their merits but the black and white trio show much more detail. The colour pictures show a clear H-Beta absorption line (in the light blue) but the H-Alpha and H-Gamma lines (in red and blue, respectively) have to be searched for. The black and white shots not only clearly show these three absorption lines, but also show the H-Delta line.

It is also much easier to locate the peak luminosity when looking at the black and white images. Looking at the colour images the peak luminosity could lie anywhere in the light blue, green or yellow. The black and white images quite clearly show luminosity peaking in yellow.

Friday 27 August 2010

I Got The Sun In The Morning...

...And all of the rest of the day since I now have an Orion Solar Filter. Simply fit it over the front of the telescope and it cuts out 99.999% of incoming light. This makes the Sun a safe observing target and shows up sunspots, prominences and granulation.

Sunspots are areas on the surface of the Sun where the magnetic field has become tangled up making one patch cooler than the surrounding area. The temperature of the sunspot will be around 4,000 degrees compared to around 6,000 degrees for the surrounding area. The cooler area shows up as dark spot on the surface. Sunspots can be very big - the biggest can be up to around 50,000 miles across.

It has been well publisized that the Sun has been rather quiet over the last few years. The Sun goes through a fairly regular cycle every 11 years or so where it changes from having very few sunspots to lots of sunspots and back again. The current low period has been going on for longer than usual but there are signs that activity is beginning to pick up again (last year 71% of days showed no sunspots compared to 16% so far this year).

This increase in activity left me optimistic that once the recent spell of rain had abated I would be spotting spots straight away. Alas no. The clouds cleared at the start of a mini-streak of 5 spot-free days. This morning was a different story. After consulting the latest space weather, I knew that I'd have at least one sunspot to look at, and here it is:


Sunspot 1101 is clearly visible in the bottom-right quadrant. There was quite a lot of whispy cloud around (as can be seen in the picture) so I settled for a few afocal snaps rather than getting out the webcam. It will be interesting to see what resolution can be achieved on a clearer day and what happens to sunspot 1101 in the future.

Sunday 22 August 2010

Gamma Cassiopeiae

With autumn approaching I felt it was about time to turn my spectroscopic attention to Cassiopeia. The first stellar spectrum I ever observed was that of Gamma Cassiopeiae and 15 years later I couldn't wait to see how it would look through my Star Analyser.

Back in 1866, Gamma Cassiopeiae was the first star ever observed with emission lines in its spectrum. This made it the prototype Gamma Cassiopeiae Variable star, the first known Be star (a type B star with emission lines), and one of the most popular targets for spectroscopy ever since.

One of the most common features of a stellar spectrum is to see hydrogen absorption lines. These are caused by hydrogen atoms in the star absorbing light at a wavelength corresponding to the energy required to excite an electron between different energy levels. For example, the spectrum of Sirius that I posted last month shows a clear H-Beta absorption line caused by exciting electrons between the second and fourth energy levels.

Here are three spectra I took of Gamma Cassiopeiae and instead of absorption lines we can see a clear H-Alpha emission line (in the red part of the spectrum).


Clearly some other process must be taking place. Some of the great minds of the early 20th century found that these emission lines must be coming from material around the star rather than the star itself. This material is a disc produced by a combination of very rapid rotation, magnetic fields and stellar pulsing. The cooling of hydrogen atoms in this disk then produce the emission lines seen in the stellar spectrum.

When I observed this star at university (with considerably better equipment!) I could produce a much more detailed spectrum. It was possible to measure the rotation speed of the disc by calculating the Doppler broadening of the emission line. It was also possible to see a narrower absorption line in the middle of the broad emission line caused by the disk absorbing light from the central star.

Sunday 18 July 2010

Copernicus

It doesn't take many lunar observing sessions before ending up with a picture of Copernicus. Here's a picture I took during an observing session in March. It was a near full moon so the surface is looking rather flat.


I got the webcam orientation a bit wonky so north is roughly pointing towards 4 o-clock. Copernicus is a relatively new crater being around 800 million years old. Typical of many Copernican period craters it has a prominent ray system and the crater hasn't been flooded with lava - some of the features inside the crater are obvious even with this little shadow.

The relatively bright crater in the bottom-right corner is Pytheas, a crater of similar age to Copernicus and located in the southern part of Mare Imbrium. To the right of Copernicus in this picture is the mountain range Montes Carpatus which is 2-3 billion years older than the two craters just mentioned.

The two medium-sized craters situated at 11 o'clock are Reinhold and Reinhold B, both of which are much older craters than Copernicus.

It's a shame I didn't pick a slightly shifted field of view - a little more towards the top-right would have given a better view of Montes Carpatus, but just out of shot in the bottom-left is Eratosthenes which would have made a great target alongside Copernicus. Maybe next time.

Saturday 17 July 2010

Mersenius and Gassendi

Mersenius and Gassendi are two large craters in the southwestern part of the Moon and are the next step in my quest to image the entire lunar surface.


Of the two large craters in the middle of the picture, Mersenius is on the left and Gassendi on the right. The large, smooth, dark region at the bottom of the picture is Mare Humorum and North is roughly towards one o'clock.

Mersenius is 84km in diameter, 2.3km deep and was formed nearly 4 billion years ago. The interior of the crater has been flooded by basaltic lava which has solidified into a central dome shape and covered many other features. The rim of the crater is heavily worn particularly at the northern edge. The small crater Mersenius N can be seen lying across the southwestern rim.

Gassendi is a larger and apparently shallower crater. Similarly to Mersenius, Gassendi has been filled with lava but some of the multiple central peaks are still visible. The crater situated on the northern rim is Gassendi A and the appearance of the two craters has been likened to a diamond ring.

Friday 16 July 2010

Spectroscopy

At the beginning of this year I added a new toy to my stargazing kit - the Star Analyser 100 from Paton Hawksley. I'd always had a hankering for getting into stellar spectroscopy and this looked like the perfect starting point - spectrometers are VERY expensive, the Star Analyser could get me started for under £100.

Spectroscopy is essentially analysing the light from an object and seeing how the intensity of the light varies as a function of wavelength (i.e. looking at the spectrum of the object). This can reveal all manner of things such as the temperature of the object, what it is made of and how fast it is moving. This is detailed analysis that needs finely tuned equipment and the Star Analyser tries to fill a gap in the low end of the market - it won't show the detail but it's fun, easy to use and informative.

The Star Analyser is just like a standard filter - it screws into any eyepiece and off you go. When combined with my webcam it means I can take pictures of stellar spectra for further analysis. Here are some spectra I took of Arcturus:


As you can see, the results are very consistent and show some detail - the red appearance of Arcturus is obvious and the dark line on the middle-right is one of the Fraunhofer absorption lines due to oxygen in the Earth's atmosphere.

To show the difference between a relatively cool K-type star like Arcturus and something a bit hotter, here's a spectrum taken of Sirius an A-type star:


The spectrum is much more green/blue and other features are visible such as the H-Beta line in the light-blue section.

Another interesting use of the Star Analyser is to compare stellar magnitude. I find it much easier to compare the brightness of two spectra rather than looking directly at the stars. Providing I keep the webcam settings the same and compare stars of the same spectral type then I get a decent comparison of magnitude. I tried this with the main stars in the Plough (which are mostly A-type stars) and got a magnitude comparison and therefore distance approximation. I haven't had much chance to play around with this yet and feel it needs a new post anyway! I'll also follow this post with a description of how to get a spectrum from using the Star Analyser.

Thursday 24 June 2010

Saturn

It's been a while since my last post and the almost permanent twilight of this time of year means I've produced no new material for about 6 weeks. Still, this gives me the chance to catch up on some webcam pictures from earlier this year.

For stargazers like myself who aren't that interested in starting an observing session at two in the morning, Saturn came back into range in around early March. For pre-midnight observing it was still lurking in the haze near the horizon and, for my location, in the direction of Birmingham city centre but Saturn is Saturn and it was my first chance to see it through the new 'scope.

It's just not possible to tire of seeing those rings and I was at the eyepiece for most of session - it's not the same looking at a laptop screen! I recorded a couple of decent videos, the best of which produced this:


The rings are still quite narrow but they should open out nicely throughout the year. And I'll have to try and make the most of it - after more than a decade in the northern sky Saturn is now most definitely heading south which will soon mean about 13 years of less favourable viewing.

Saturday 24 April 2010

Kepler

Another of my early lunar targets is Kepler and its near neighbours Marius and Reiner. Kepler is an impact crater located just above the equator on the west-side of the Moon (west of Copernicus).

Kepler has a pronounced ray system similar to that seen around other prominent craters such as Copernicus and Tycho. Ray systems are formed by radial streaks of ejecta thrown up during the formation of an impact crater. Larger chunks of ejecta can also form smaller secondary craters around the main impact site. Ray systems usually have a higher albedo (reflectivity) than the surrounding material so appear brighter.

Here is a picture of Kepler created from a 4 minute webcam video:


Kepler is the crater with the ray system in the top-right, Marius (top) and Reiner (bottom) are towards the left. Marius is another crater that has been flooded by basaltic lava leaving the interior flat and smooth with no central rise.

Friday 9 April 2010

Aristarchus

After getting plenty of practice on Mars, webcam astrophotography of the Moon is pretty easy - finding the target couldn't be easier and there are plenty of features to focus on.

My recent observing sessions have coincided with a near-full moon so my first lunar targets have been towards the edge of the disk. In this post I'll be looking at Aristarchus which is one of the best known lunar regions.

The Aristarchus crater is located in the north-west of the Moon at the south-east edge of the Aristarchus plateau. It is one of the brightest lunar features with an albedo of nearly double that of most other features. Next to Aristarchus is the slightly smaller crater Herodotus which is darker due to the crater floor being flooded with lava. Evidence of earlier volcanic activity is also seen in the prominent rille Vallis Schröteri which winds its way northwards from Herodotus.

This region is a satisfying target for astrophotography and here are a couple of images from my observing sessions on Feb 26th and March 27th 2010.


The brightness and depth of the features shows up well in both pictures, particularly the bottom picture which has a more prominent terminator and a slightly sharper angle of observation.

From a technical point of view, each picture is based on stacking the best 400 or so frames from a 4 minute video. I did very little processing the stacked image - simply increasing the contrast, decreasing the brightness and making a few small adjustments on the layers to strengthen some of the finer detail.

Saturday 3 April 2010

Registax Basics

As I mentioned earlier I use Registax to process my webcam videos. There are quite a lot of settings and controls which at first glance can be intimidating, but it's easy to use with a little practice.

The first major step is alignment. For my reference frame I try to pick a relatively high quality frame from the first 50 or so. Then comes the selection of alignment method. So far I've dealt with 2 types of target - planetary and lunar. For planetary videos I use centre of gravity alignment and drop the luminosity threshold to around 30%. This set-up means the alignment process will work for a target with few clear features that jumps around between frames, which is the case for targets such as Mars. For lunar videos I use a single, large alignment box (usually 256) centred on the most obvious feature in the reference frame. I have tried using multi-align but find that it rarely works. Since my videos are quite short (around 4 minutes) there should be little image rotation and I doubt multi-align would significantly improve my final image.

After alignment has completed the images need to be stacked. As a rule of thumb I aim to stack around 400 images which can be varied by changing the quality settings. For a good quality video the lowest quality should be around 95% of the reference frame.

The next few steps are straightforward until the final stage of adjusting wavelets and picture settings. This is something of a process of trial and error but there are some settings that work more often than others. The main controls are the 6 picture layers, the contrast and the brightness. Starting with the easy ones, I find that turning the contrast up (around 130) and brightness down (around -25) usually helps. The layer sliders enhance the detail in different parts of the image but if over-used can create an unnatural looking image. I find that enhancing layers 4 and 5 often has the best effect, usually picking values in the 10-30 range. Since it can be hard to decide on a 'best' image, I always create a set of images using a range of settings and then compare these side by side to pick my favourite.

All in all Registax is very easy to use and can turn a video into a crisp picture in about 15 minutes.

Friday 2 April 2010

Getting to Grips with Mars

After my first 2 practice sessions and compiling my top tips for webcam success, I had high hopes for some decent images. Add to this some excellent viewing conditions and Mars at opposition and I had everything in my favour.

I started with some preliminary videos without a Barlow while I was waiting for the telescope to cool and the sky to darken, but my plan was to spend the bulk of my observing time with using the 2x Barlow.

Now that I'd done this a few times it was fairly easy to get the target into the webcam field of view even when using the 2x Barlow. I spent 5 minutes or so getting the best focus that I could and recorded a 4 minute video. I repeated this another 3 times and once more with a 5x Barlow. It was much more difficult to track the target when using the 5x Barlow. Not only does it move across the field of view much quicker but it also accentuates the difference in responsiveness when tracking in altitude compared to azimuth. This in turn makes it much harder to focus the target. As a result I only managed to record 1 minute of material with the 5x Barlow.

Just looking at the raw videos it was obvious that I had some better quality images. A Registax processing session later and I had my first pictures of Mars that I am pleased with! As is the way with post-processing, the final image can look completely different depending on the chosen settings. Here are 2 of my favourite images from the videos using the 2x Barlow:


The polar ice caps and some of the darker upland regions are very clear in both images.

The video using the 5x Barlow wasn't as successful and it looks as though I didn't focus it well enough. Having said that, there is some detail and it's no worse than my early efforts with a webcam so hopefully I'll be able to crack it in the future. Here's the best of the high magnification images:

Tuesday 30 March 2010

Webcam Tips

Ok, so I haven't exactly been doing webcam astrophotography for very long but there are some key things that I've figured out pretty quickly.

1. Set up your equipment so that you'll be comfortable
You could be outside for several hours and there are enough things to be doing without grappling with your equipment. Make sure that you have your laptop on a table at a good height and your chair positioned for easy access to both the laptop and the eyepiece. I try to position the telescope at a height that makes it possible to use an eyepiece without needing a diagonal. This minimises the amount of focussing when switching between eyepiece and webcam, which in turn makes it easier to get the target in the field of view of the webcam.

2. Get an UV/IR blocking filter for use with the webcam
It makes for a better image, makes it easier to focus the target and also eliminates the worry of getting dirt onto the webcam chip.

3. Spend the first couple of observing sessions just getting used to the webcam and settings
Try things out, get used to having the extra equipment around and take some videos so that you have something to practice post-processing on.

4. Tend towards under-exposing rather than over-exposing
The default webcam settings will probably over-expose the image. This is fine while trying to locate the target but once found it's best to turn down the gain and/or increase the shutter speed. Increasing the frame-rate is also beneficial.

5. Focus is crucial
If the target isn't focused properly then the final image will suffer for it. Once you've got the right webcam settings, spend a few minutes finding the best possible focus.

6. Get a good number of frames to process
My webcam takes videos at 15 frames/sec and I aim for 4 minutes of material which means around 3600 frames.

7. Let your telescope reach thermal equilibrium before observing
Sometimes it can be a pain thinking about it in advance but it does make a difference if the telescope has been sitting outside for an hour or so before you start taking videos.

8. Get decent alignment on your finderscope
It's never going to be perfect but if you're searching for the target with the telescope than you'll have problems finding it in the webcam. If it's on the cross hairs of the finder than it should be in the field of view of an average eyepiece.

9. Watch how the target moves across the field of view
Getting the target in the field of view of the webcam when using a Barlow is not always easy. I've had most success by positioning the target on the edge of the telescope field of view so that it will move through the centre of the field of view a few seconds later. This gives me enough time to switch the eyepiece for the webcam and wait for the target to appear. This is the only way I've been able to find Mars with a 5x Barlow.

These simple techniques have greatly improved my webcam imaging as we'll see in my next post.

The Chances of Anything Coming From Mars...

After my first unsuccessful yet instructive attempt at webcam astrophotography it wasn't long before I could have another go. The target was once again Mars but this time I was better prepared for what lay ahead. The million-to-one odds didn't seem unreasonable though...

I had realigned my finderscope during the day and had little difficulty in getting Mars into the field of view of the webcam. I spent a minute or so getting used to tracking the target and then changed the webcam settings to reduce the gain and increase the shutter speed. This makes the image dimmer and much easier to focus as well as stopping it from being over-exposed.

Once I had focussed the image as best I could, I increase the frame rate to the maximum setting. Although the webcam software claimed it could operate at 60 frames/sec it seemed to have an actual maximum of 15 frames/sec. Satisfied with the image I started recording and tracked Mars for 4 minutes. I then followed the same process while using a 2x Barlow which left me with 2 videos to play with in Registax.

Loading the first video into Registax there was an obvious improvement from my first attempt. Even looking at a single frame there were some discernable features. I aligned the frames using centre of gravity alignment and stacked the best 250 or so of the 3600 frames available. The end product wasn't going to win any awards but once I'd tinkered with the layers it was a marked improvement on my previous effort. If nothing else the polar icecap is clearly evident. Unfortunately the higher magnification video wasn't focussed properly so it didn't yield anything useful.

I still had a long way to go but I'll leave you with the best of my images and will return with my latest, and by far the best, Martian observation in a couple of posts time.

Sunday 28 March 2010

Starting Out With A Webcam

As I mentioned earlier when it came to moving into 'proper' astrophotography I decided to go down the webcam route. Firstly my suburban location keeps a large proportion of my observing within the solar system and secondly a £50 webcam was much more appealing than a £700 digital SLR camera.

Based on a whole host of recommendations on various websites I managed to track down a secondhand Philips SPC900 webcam on Amazon. The drivers and software I downloaded from the Philips website.

The power of this particular type of webcam is that it is possible to take a video of an object and then stack the individual frames on top of each other to create a much better image. Obviously one doesn't want to be stacking thousands of frames by hand so it's best to use a specialised software package. I downloaded a package called Registax that is widely recommended.

For my first webcam session, the final pieces of the jigsaw were a couple of Barlow lenses. Planetary observing calls for high magnification and narrow field of view so focal extenders are vital. I already had a 2x Barlow and added a 5x Barlow that I ordered from Telescope House.

So I was set-up and ready to go, just waiting for my chance which eventually came on February 9th 2010. Unfortunately this was a moonless night so my options were limited - the easiest target wasn't around, Jupiter was setting a little too early and not visible from my garden, Saturn was rising a little too late. This pretty much left me with Mars which isn't the easiest of first targets. Still you've got to start somewhere!

To sum-up what is about to follow, as an observing session it was a disaster. I did almost everything wrong and didn't produce any images of any quality at all. However I did learn an enormous amount about webcam astrophotography.

The first problem was actually getting the target into the field of view of the webcam. My finderscope clearly wasn't aligned as well as I thought it was - it's one thing to view the target through the telescope but something completely different to get it into the much smaller field of view of the webcam. Add to this the extra clutter of having extra equipment and a laptop to contend with and at times it was rather frustrating.

Once the target was in the field of view there was then the problem of focussing it. Even without a Barlow lens the target would move across the whole field of view in about 15 seconds. This isn't much time to get good focus on a laptop screen. Also the webcam picks up ultraviolet and infrared wavelengths not perceptible to the human eye which adds a haze to the image making it harder to focus.

The other major problem was getting the right webcam settings. I had played around with the settings during the day but this hadn't fully prepared me for picking the appropriate gain, frame rate and shutter speed during an observing session.

Despite these problems I took a number of videos so that I had something to practice with in Registax. Using registax for the first time was a pleasant experience. Although the number of options and controls was slightly intimidating at first, I soon realised that the basics go a long way. I will do a seperate post on my Registax experience in the near future.

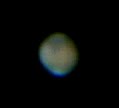
For completeness I will include the final processed image from one of my videos. As an image in itself it is rubbish but as a demonstration that one shouldn't expect great things from a debut webcam session it is perfect!

Saturday 27 March 2010

Partial Lunar Eclipse

A fitting way to round off my early adventures in afocal astrophotography is with the partial lunar eclipse of December 31st 2009.

The viewing conditions weren't particularly good but I did get to watch the eclipse from start to finish over about an hour and a half. As a result my photos aren't particularly sharp but I can't complain since many parts of the UK didn't get to see the eclipse at all. The pick of the bunch is this one, which is and close to maximum shadow and relatively sharp (although still hazy):


Not only did this eclipse mark the end of 2009 but it also marked the end of my main method of astrophotography - the arrival of my webcam was imminent...

More Afocal Astrophotography

My second attempt at afocal astrophotography was of a very striking half-moon towards the end of November 2009. The pick of the photos is this one:


I particular like the arc of mountains in the upper half of the picture, running from Plato at the top downwards to Eratosthenes. Inside this arc the largest crater is Archimedes.

A couple of points of interest: if you follow the mountains away from Eratosthenes until just before the first obvious gap this is roughly the landing site of Apollo 15, the fourth Moon landing. Secondly to get a feeling of the scale of features on the Moon, Eratosthenes is about 35miles or 58km across which is not far off the size of my home city of Birmingham.

Monday 22 March 2010

First Light

As I mentioned in my earlier posts I got back into observing about 5 months ago which means I have quite a lot to catch up on, particularly from an astrophotography point of view.

My first observing session was on 1st November 2009 which happened to be a nearly full moon. I didn't have my webcam back then so had do make do with what was available. I'd seen some impressive results from people doing afocal astrophotography so I thought I'd have a go with my point-and-shoot Olympus digital camera.

For those who don't know, afocal astrophotography is simply holding a camera up to the eyepiece and taking a picture.

I started with a 32mm eyepiece so that I could get the whole of the moon in the field of view. I also used a moon filter to reduce the glare.

After a few minutes of messing around it was very easy to get some decent shots. The pick of the bunch was probably this one...


For something so easy it was hugely satisfying to produce such good results. I tried increasing the magnification but found it much more difficult to align the camera at the eyepiece. Also the photos of smaller sections of the moon were nowhere near as impressive as getting the full moon into the field of view.

So that was my first step into astrophotography. A very small and simple step but one that left me wanting more.

Saturday 20 March 2010

Equipment

Buying our first house towards the end of last year was the catalyst for getting back into observing. For the first time in years I have a garden that I can set up in. Plus the cost of some new equipment was less scary when compared to the deposit for the house.

It was a pretty easy decision to buy a Meade LX90. I'd used a Meade Schmidt-Cassegrain telescope at university and always found it a pleasure to observe with. My only real decisions were what aperture and whether to get the ACF (coma-free) version. In the end I settled on 8" for portability and non-ACF since I don't see coma greatly affecting my backyard/solar system based observations. Five months later I am convinced that I made the right choice.

Of course the telescope is only half the story. For a starter set of eyepieces and filters I bought the Revelation Photo-Visual Eyepiece and Filter Kit from Telescope House. This has 5 Plossl eyepieces ranging from 9mm to 32mm, a 2x Barlow, a moon filter, 4 planetary filters and a camera adapter. I also invested in a new diagonal (also by Revelation) since the one supplied with the LX90 isn't brilliant (although it is useful during imaging sessions due to it being easier to attach). A power-supply, red torch and a dew-shield complete my list of initial purchases.

For astro-imaging I've gone down the webcam route. Digital SLRs are too expensive and don't seem to offer anything more when it comes to solar system imaging. I have some experience with manual SLRs and would like to use one in the future but for now I want something quick and easy.

Based on recommendations from most of the websites I consulted, I managed to track down a secondhand Philips SPC900NC webcam on Amazon. It was easy to download the drivers and other software from the Philips website and I bought a webcam adaptor from Telescope House. I also bought an IR/UV filter to remove the haze that can appear on digital images. Now I just need to work out how to use all this stuff!

Friday 19 March 2010

Why Blog?

Astronomy and blogging go well together.

Firstly a basic observing log is very valuable to an astronomer. I have a detailed log that I keep up to date, but a blog of highlights can make it easier to track my overall progress.

Secondly astronomy involves a lot of trial and error. I have spent many hours trawling through other blogs and websites looking for tips on everything from dew prevention to spectroscopy. Maybe what I'm doing will be useful to someone else or maybe someone will be able to tell me where I'm going wrong!

I will be mostly restricting my posts to descriptions of my own observing sessions, in particular webcam astrophotography and basic spectroscopy. My location in suburban Birmingham limits my targets so you are unlikely to find much deep sky stuff.

Beginnings

It all started when I was about 8 years old. I was walking back from the local scout group with my dad and I realised that I wanted to do astronomy. I didn't know why but I knew that I did.

Over the subsequent 25 years my relationship with astronomy has been consistently inconsistent. I got my first telescope and barely used it. I would spend a month voraciously reading astronomy books and magazines followed by a year of not reading anything. I toyed with doing an astronomy GCSE and bought a second telescope that gathered dust alongside the first one.

Things started to change in the 90s when I began an astrophysics degree at University College London. It all seemed exciting again and they have some serious telescopes. I imagine it will be quite some time before I get my hands on a 24" refractor again.

But a hobby isn't a hobby when one has to study it. The physics sucked the excitement out of the astro and observing became a chore motivated by exam marks. All in all astronomy had become a bit dull and I took refuge in the mathematics department so I could have an easy life. And astronomy has been in hibernation in my life ever since...

...Until now.